Kalua Pork

pork 6

I got this Kalua Pork recipe from my aunt and now it’s (almost) world famous. My friend’s husband, a man of few words, said that “This pork is insane.” The ingredients are a little strange, but the yumminess of the finished product makes up for it.

Don’t be tempted to buy a pork loin instead of the pork butt- the extra fat on the pork butt keeps it really tender. Plus you’ll remove the fat after cooking anyways. A friend told me that pork shoulder is the same as pork butt- but I don’t have a confirmation on that, so I’m not exactly sure.

Pierce and slash the skin of the pork butt and place in the crock pot, fat side up. Pour liquid smoke over the top and sprinkle on the salt and garlic power.

pork 2

Place the two bananas, unpeeled, on top of the pork butt, fat side up, and cover.

pork 3

Cook on high for 8 hours. Yes, the bananas are supposed to be black and disgusting- don’t freak out- everything will be better in a few minutes 😉

pork 4

Remove the bananas and the extra fat (so much more appetizing, right?)….
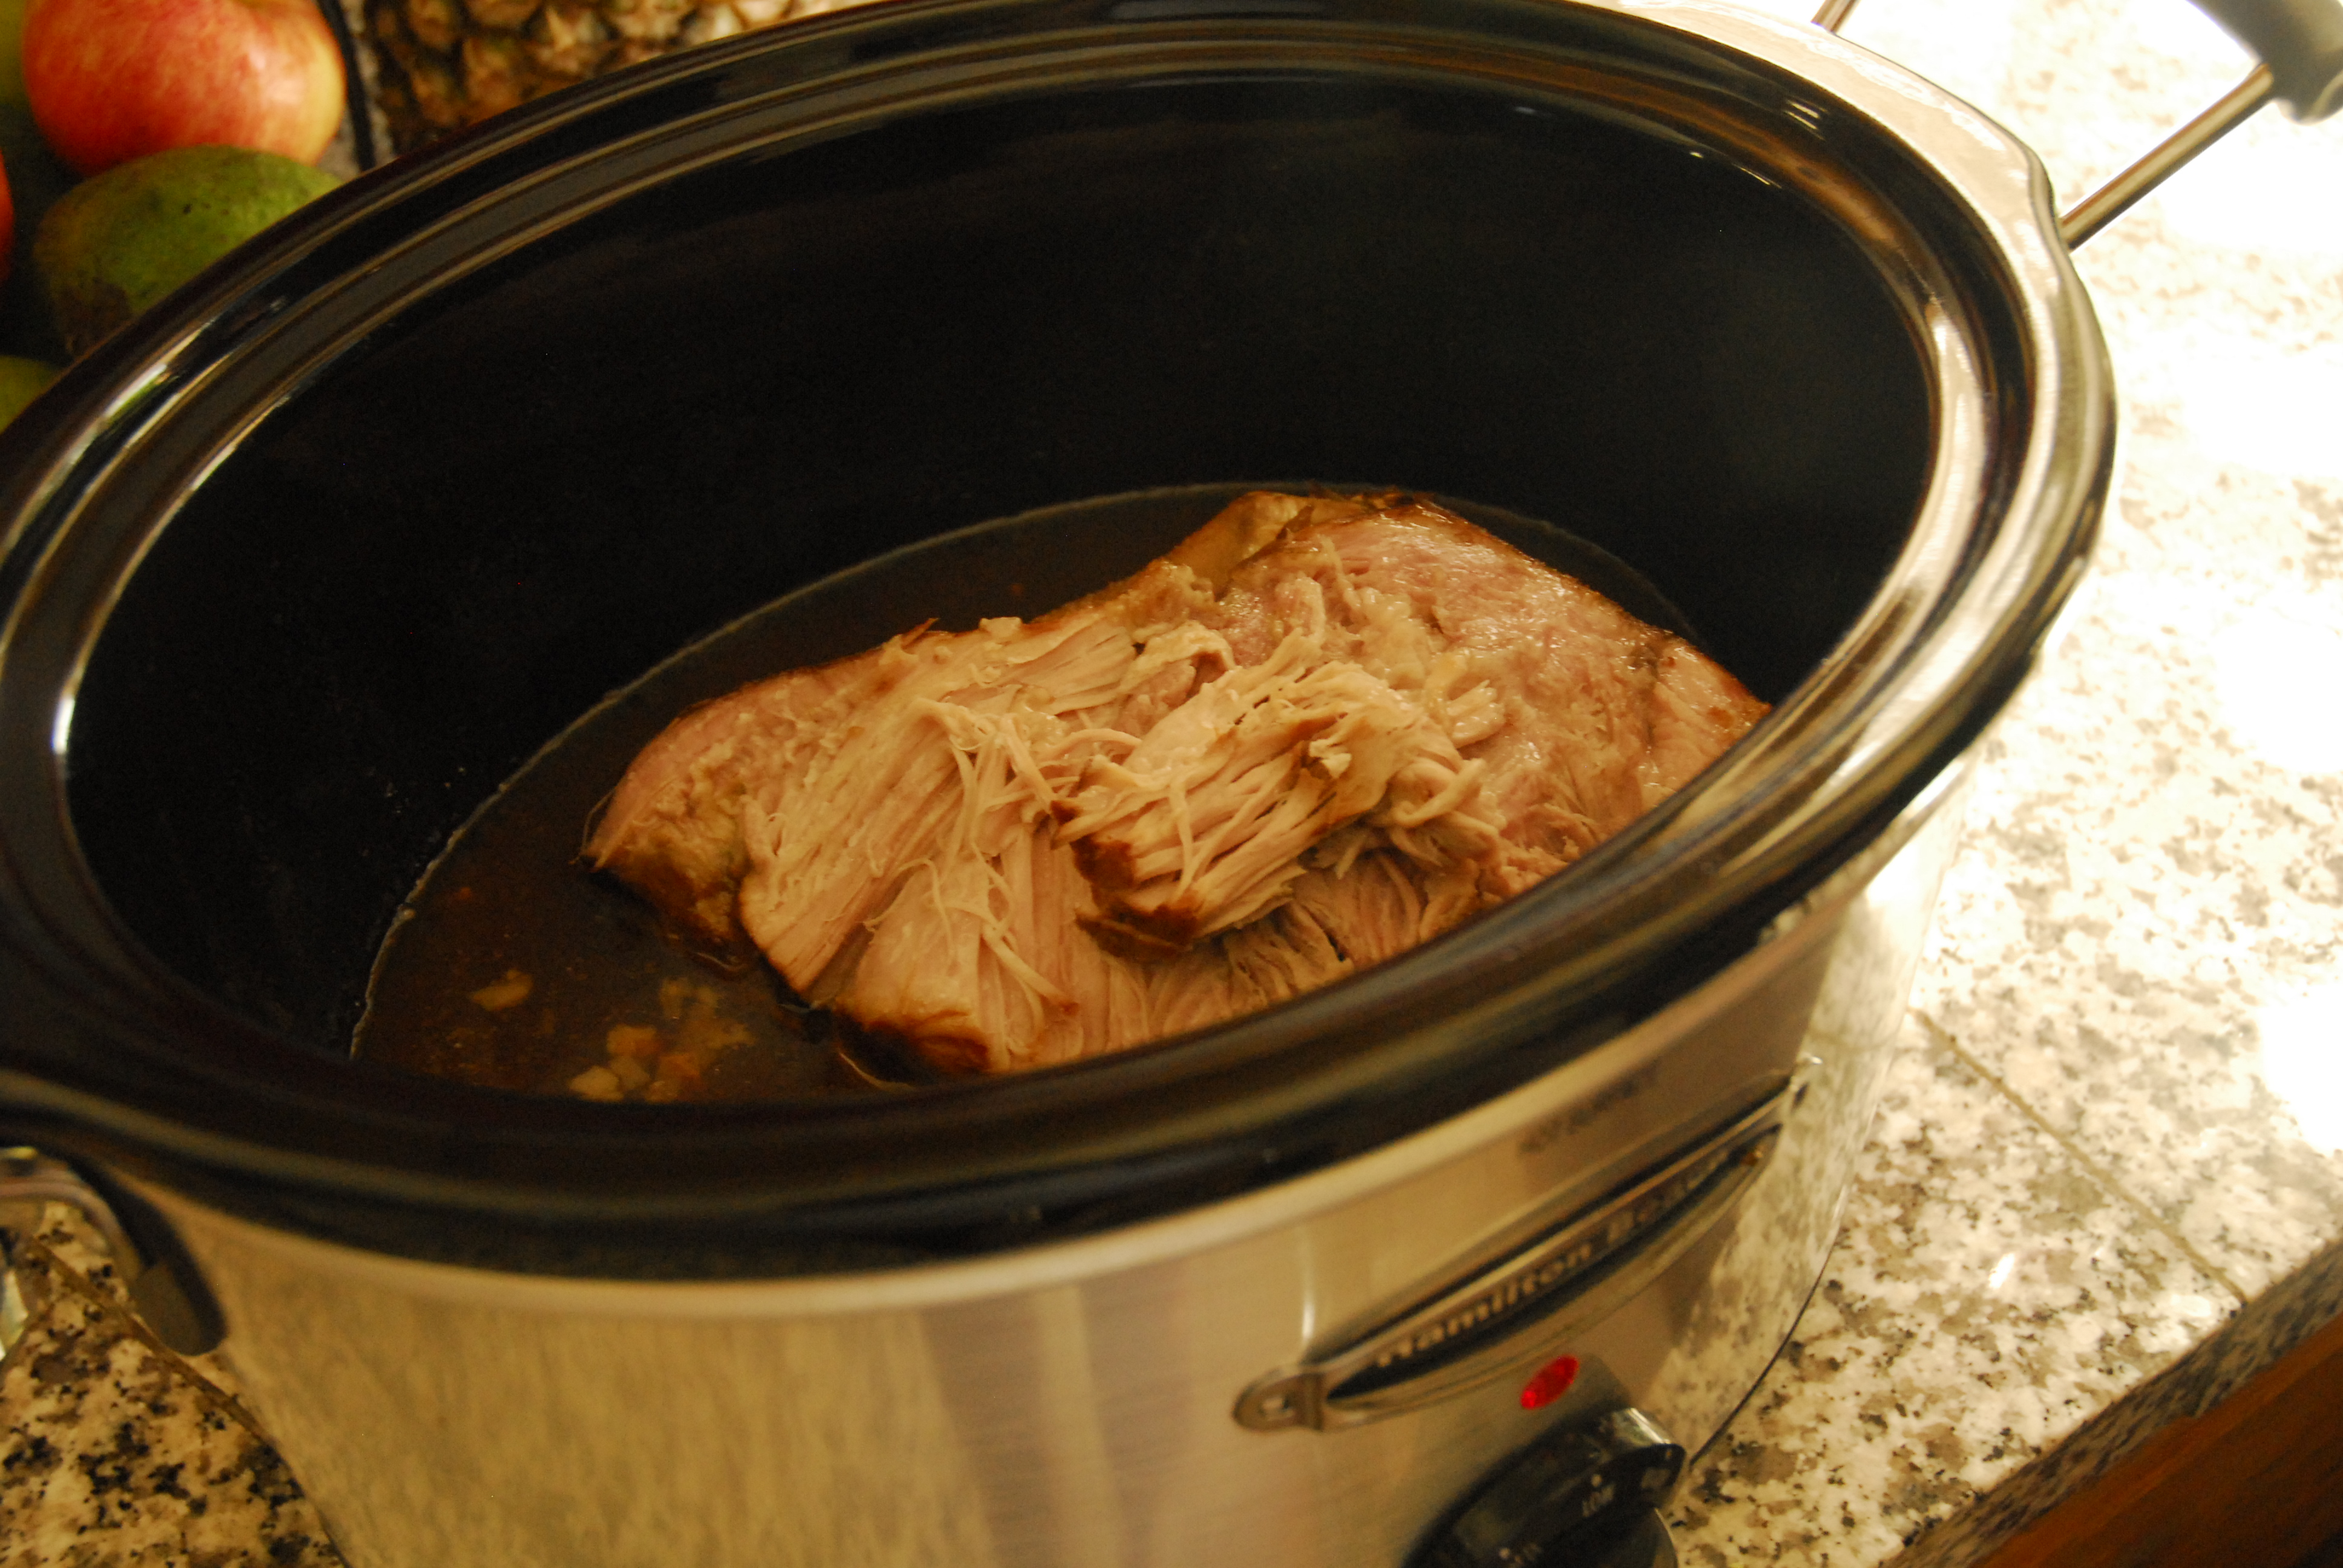
pork 5

and shred the meat.

pork 6

This pork is so delicious and tender- it doesn’t last very long around our house. We normally make tacos with the pork,

pork 7

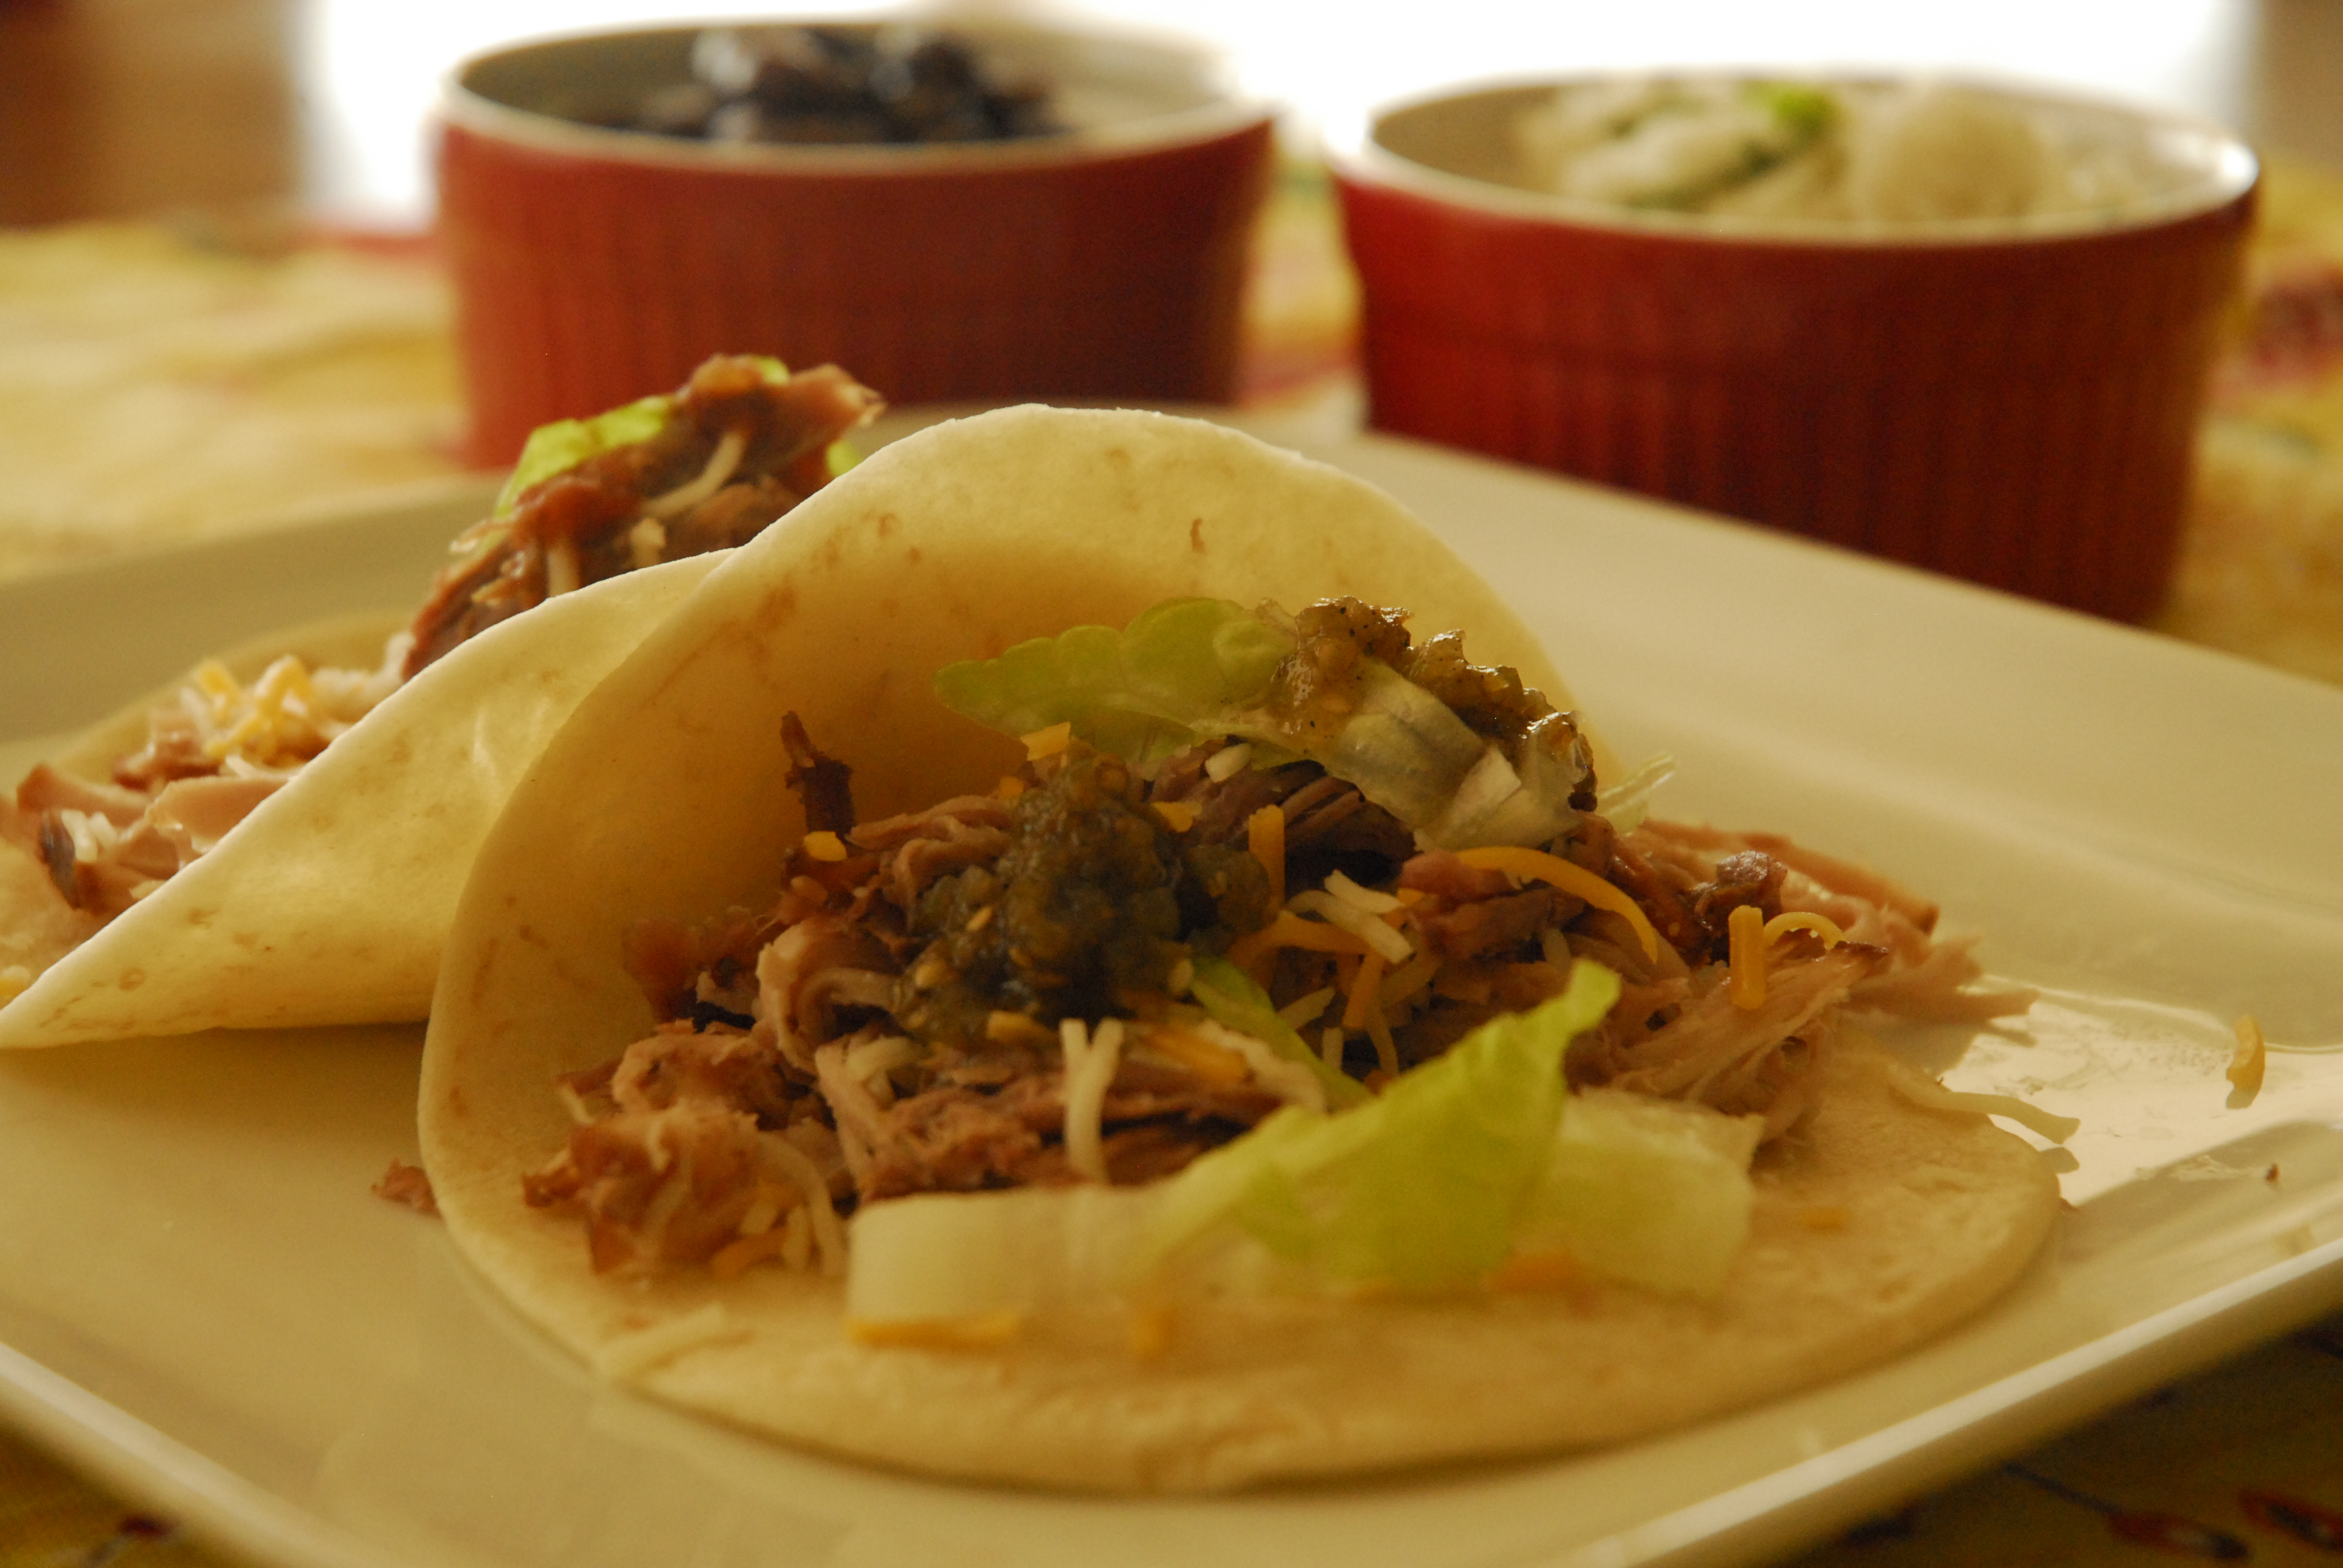
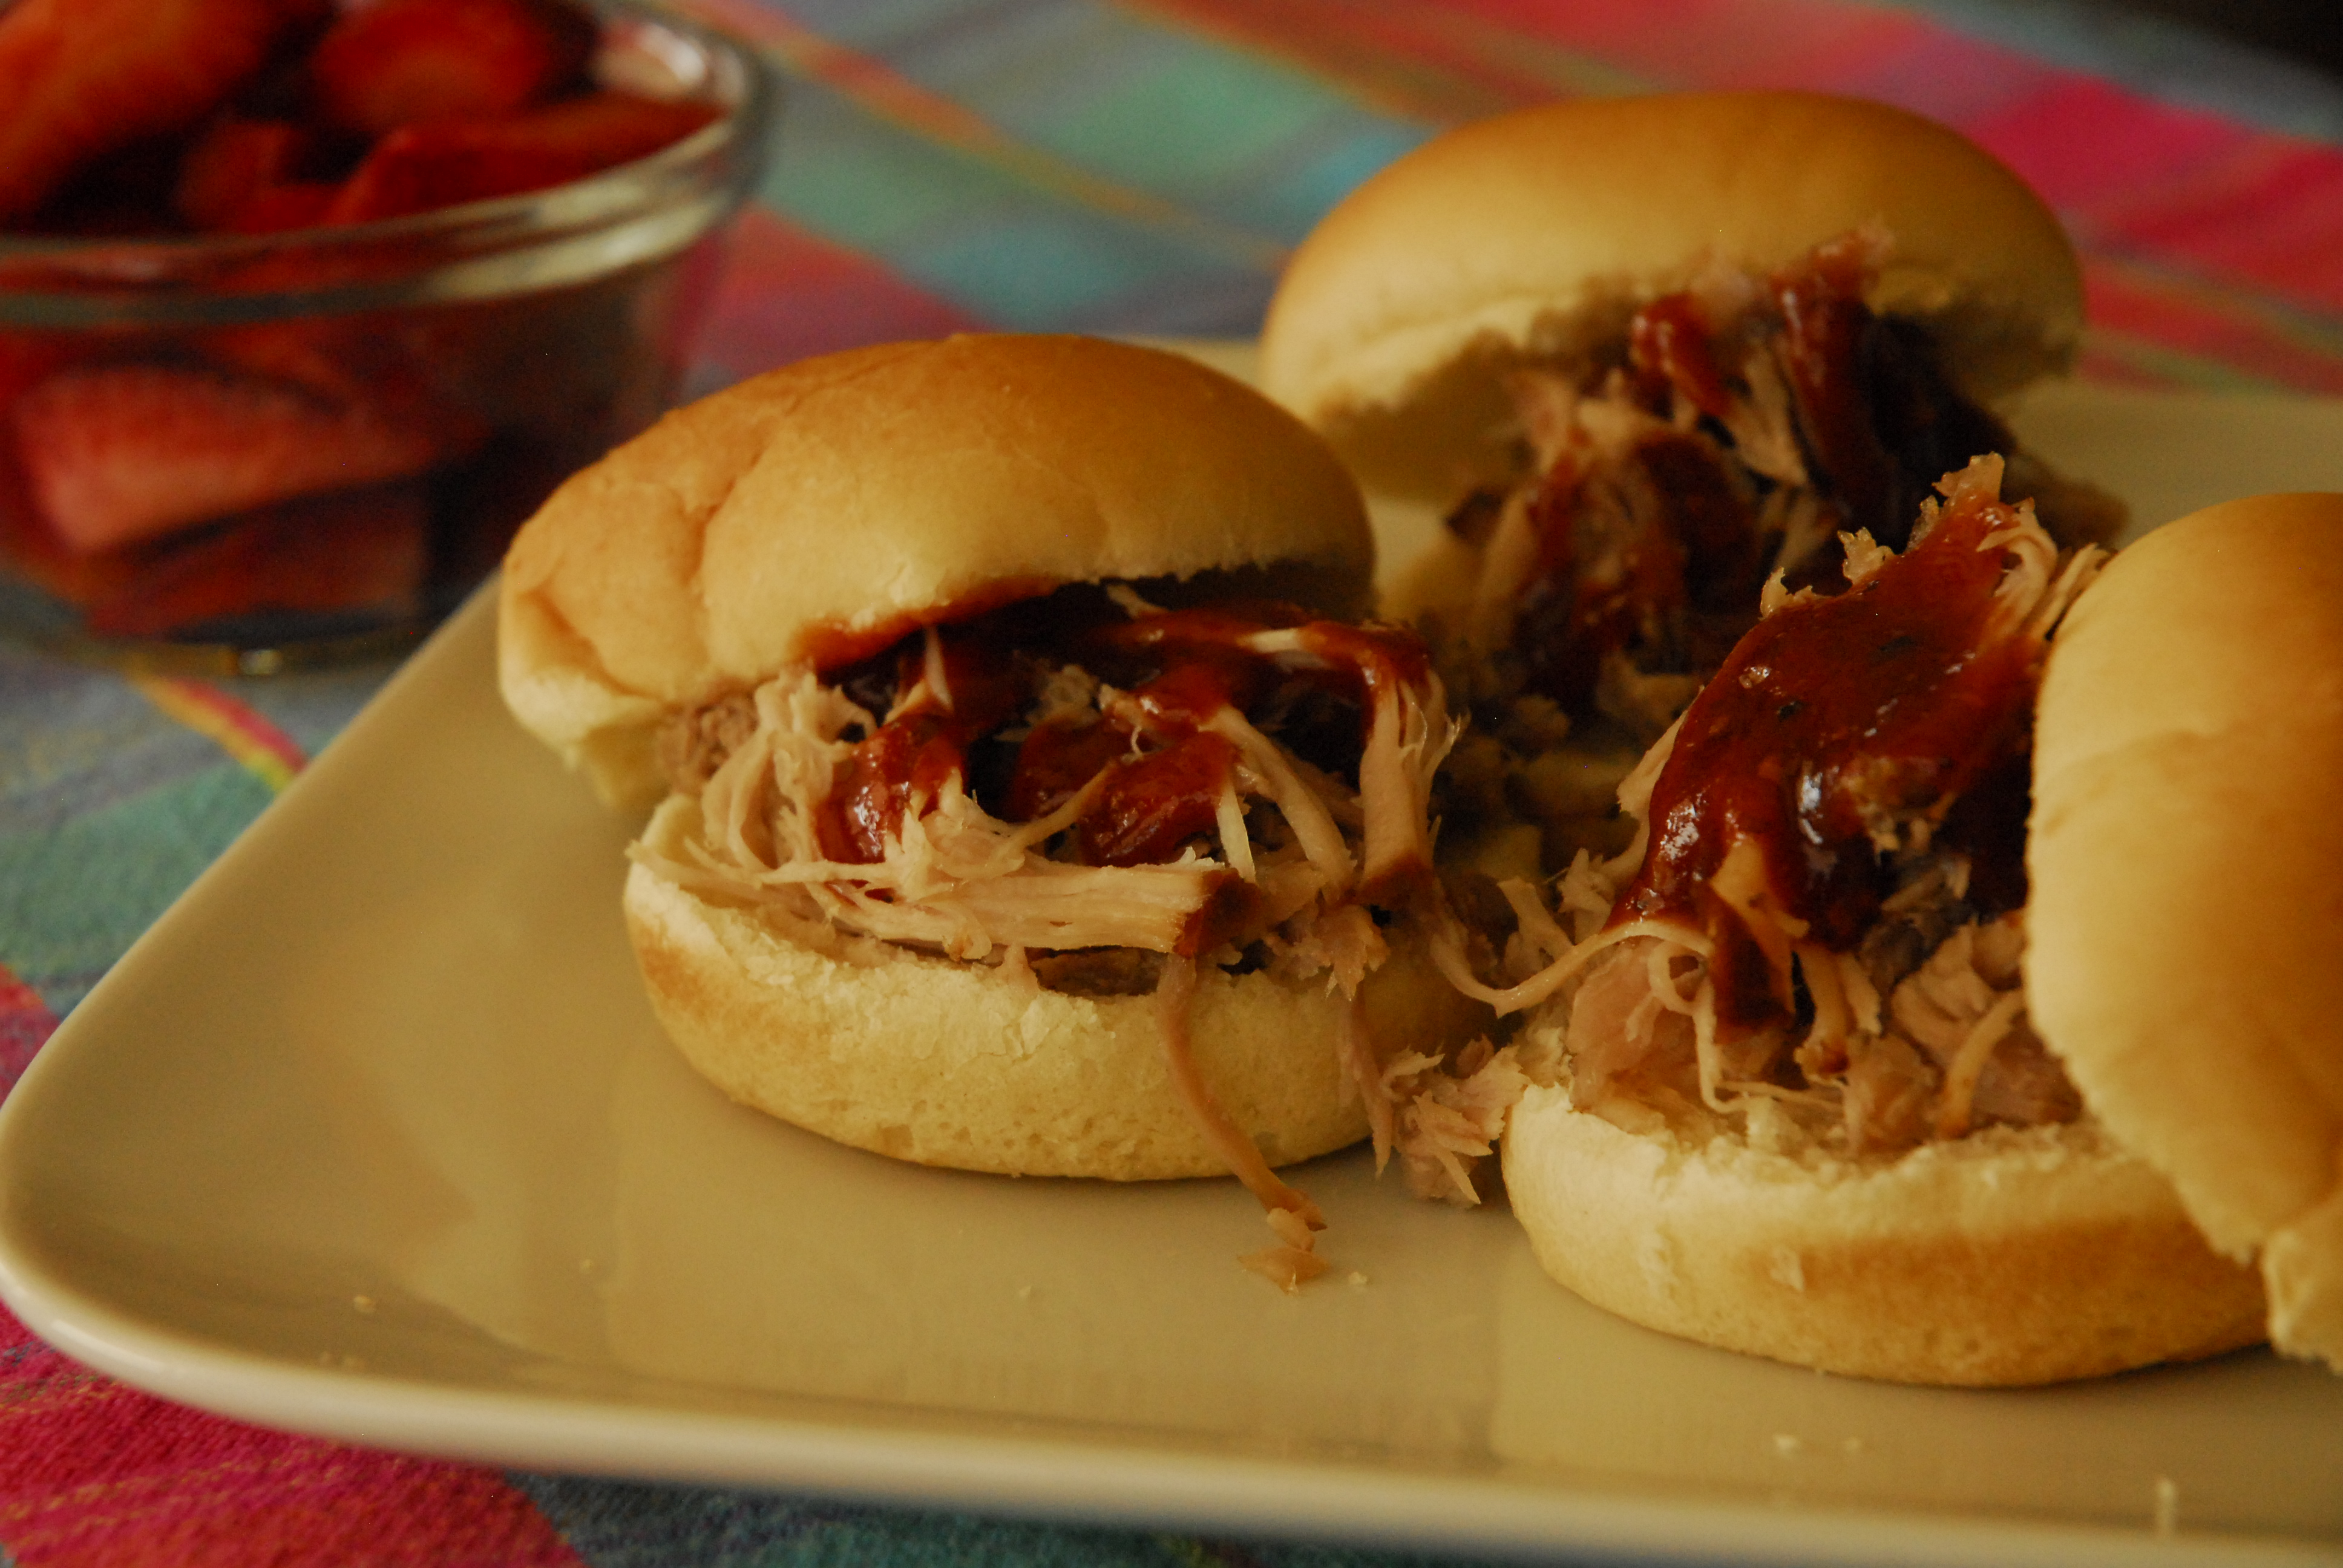
But we’ve also used it for pork sandwiches (with Rudy’s barbecue sauce, straight from an amazing little hole-in-the-wall barbecue place in New Braunfels, Texas).

pork 8

Kalua Pork

4-6 pound pork butt

1 tablespoon salt

2 tablespoons liquid smoke

1 teaspoon garlic powder

2 whole, unpeeled bananas

Pierce and slash the skin of pork butt and place in the crock pot, fat side up. Pour the liquid smoke over the top and sprinkle on the salt and the garlic powder. Place the two bananas, unpeeled, on top of the pork butt, fat side up,  and cover. Cook on high for 8 hours. Remove the bananas and the extra fat, and shred the meat.

Bruschetta Chicken

BC 6

This chicken dish has to be one of the easiest recipes ever!  It takes ten minutes tops to prep and yet it is so tasty and good.  Jordan admitted the other day that she wished that she has requested it for her birthday dinner.  Seriously?  I was shocked that she liked it so much.  We live in the middle of nowhere and can’t even get pizza delivered, but this is almost faster than delivery!

The ingredients are a bit unusual – but it so easy and yummy, it’s worth trying.

Here’s what you do:

Pour dried stuffing mix into a bowl, add the canned tomatoes, water and garlic…

BC 2

and stir until combined.

BC 3

Place chicken pieces into a lightly sprayed 9×13″ baking dish; sprinkle the chicken with the basil and 1 cup of cheese.

BC 4

Top with stuffing mixture.

Bake at 375* for about 25 minutes and then top with the last cup of cheese and bake for another 5 to 10 minutes or until the chicken is cooked through.

BC 5

Watch to be sure that the topping doesn’t get too brown.

Obviously we failed in the self-control department…I couldn’t even wait for Jordan to take the picture before digging in!

BC 7

Yum! We serve with our famous Parmesan pasta, but with the stuffing on top, you really don’t need an additional starch.  It would be great with a salad and some veggies and crusty bread!  Enjoy!

BC 8

Bruschetta Chicken

1 14.5 ounce can of Italian diced tomatoes, undrained

1 6 ounce box of stuffing mix, I use Stove Top

1/2 cup water

2 cloves of garlic, minced

1 1/2 pounds boneless skinless chicken breasts, cut into bite-size pieces, or the tenderloin pieces

1 to 2 tsp. dried basil

2 cups shredded mozzarella cheese or Italian blend cheese, divided

Here’s what you do:

Pour dried stuffing mix into a bowl, add the canned tomatoes, water and garlic and stir until combined.

Place chicken pieces into a lightly sprayed 9×13″ baking dish; sprinkle the chicken with the basil and 1 cup of cheese.  Top with stuffing mixture.

Bake at 375* for about 25 minutes and then top with the last cup of cheese and bake for another 5 to 10 minutes or until the chicken is cooked through.  Watch to be sure that the topping doesn’t get too brown.

This recipe originally came from kraftfoods.com.  I made a few tweaks over the years.

tags- chicken, main dish, easy, tomatoes, stuffing

Andes Mints Brownies

_DSC0119

These babies are crazy good!

I had a hankering for brownies the other day and I remembered that I had picked up a bag of Andes Creme de Menthe Baking Pieces just a few days before from the grocery store. Who knew these delicious little treats existed? I didn’t – and now I’m sort of sorry that I discovered them.

So back to the brownies, I took a basic brownie recipe and just modified it a bit. The result was a gooey, mint chocolate brownie that was delicious! You’re welcome!

Here are the ingredients…

_DSC0094

Start by melting the chocolate chips, the Andes mint chips and the butter in a saucepan.

_DSC0101

Dump in the rest of the ingredients…

_DSC0104

and stir well.

_DSC0108

Pour into an 8×8 pan.

_DSC0110

Bake at 325* for 45-50 minutes or until cooked through. Remove pan from oven, then sprinkle 1/8 of a cup of chocolate chips and 1/8 of a cup of Andes mint chips over the cooked brownies.

_DSC0113

Allow the brownies to cool (slightly) and then dig in! We enjoyed ours with a scoop of yummy vanilla ice cream. Mmmmmmm!

_DSC0149

Andes Mint Brownies

1/2 cup semi sweet chocolate chips
1/4 cup Andes Creme de Menthe Baking Chips
1 stick butter
1 1/4 cup sugar
3 beaten eggs
3/4 cup flour
1 tsp. vanilla

In a saucepan over low heat, melt together the 1 stick of butter, the chocolate and the mint baking chips. Once melted, remove from heat.

Add the rest of the ingredients and mix well.

Spread into a 8×8″ pan.

Bake at 350* for 45 to 50 minutes. As soon as you pull out of the oven sprinkle 1/8 cup of mini chocolate chips and 1/8 cup of Andes Creme de Menthe Baking Chips over the top of the cooked brownies. Allow the brownies to cool and then dig in! We enjoyed ours with a scoop of yummy vanilla ice cream. Mmmmmmm!

tags- dessert, chocolate, brownies, sweets, mint

Bean Salad

_DSC0073

Bean Salad – I know, such a boring description. I started to say colorful bean salad, because it is colorful. Then I thought I would say yummy, but of course it is! Why else would I have it on here? What can you really say about a bean salad? The truth is that this is a super easy salad that is so flavorful. I have modified this recipe 100 different ways – but I always do the dressing the same way – why mess with perfection? The dressing is awesome! Try this today!

Drain and rinse the beans.

_DSC0018

While the beans are draining, mix the dressing up in a separate bowl or measuring cup. Mix well, the sugar sort of sits at the bottom.

_DSC0043

Here are the veggies for the bean salad all displayed on a beautiful handmade cutting board. I actually save this cutting  board for special occasions, because it’s so pretty. Travis (my middle son), made it for me at woodshop when he was in Junior High. All three kids took woodshop from Mr. Wood (yes, that is really his name- sort of seems like he was pre-destined for that job, huh?). Mr. Wood is an awesome teacher who worked for many years at the public school and then started teaching homeschool students after he retired. Donald, my husband, actually took woodshop from him when he was in Junior High.

Another reason that I used this cutting board for the picture, besides the fact that I just like it, is that our other cutting boards are so ugly and gross.

So anyway, here are the veggies…

_DSC0030

Dump the beans into a large bowl and add all of the veggies, add the dressing and mix well. Squeeze one lime over the top and mix again.

_DSC0062

That’s it! It is delicious immediately, even better a few hours later! The salad will keep for a couple days in the refrigerator.

_DSC0103

Be creative and add whatever you like. We’ve added fresh corn, zucchini, carrots, etc. We often add a bit of avocado just before serving because we love avocado! Enjoy!

Bean Salad
4 15 ounce cans of beans – whatever kind you like. We used black, small red and white beans.
1 cup bell pepper, chopped
1/2 cup red onion, chopped
1/2 cup cilantro, chopped

Dressing
1/3 cup apple cider vinegar
1/4 cup olive oil
1/4 cup sugar
1 1/2 tsp. salt
1 tsp. pepper
1/2 tsp. cumin
Juice from 1 lime

Drain and rinse the beans. While the beans are draining, mix the dressing up in a separate bowl or measuring cup. Mix well, the sugar sort of sits at the bottom. Dump the beans into a large bowl and add all of the veggies, add the dressing and mix well. Squeeze one lime over the top and mix again. That’s it! It is delicious immediately, even better a few hours later! The salad will keep for a couple days in the refrigerator.


tags- bean dish, side dish, salad

Banana Pancakes

_DSC0282

Happy Friday! I can’t believe another week has passed. It is crazy! Speaking of crazy, these banana pancakes are crazy good! I stole, er borrowed this recipe from one of my favorite blogs, Iowa Girl Eats. I made a few minor changes and added an amazing bananas foster-like sauce and now I call it my own!

Just kidding, check out iowagirleats.com for a sweet post on her brother’s famous banana pancakes and then try this recipe yourself this weekend.

If you don’t want to make the super sweet sauce – the pancakes are light and fluffy and absolutely delish without the sauce. But they are amazing WITH the sauce!

First, moosh the bananas and set aside-

_DSC0194

Mix together flour, baking powder, baking soda, salt and sugar in a large bowl, making a well in the center.

_DSC0199

In a separate bowl whisk together eggs, melted butter, milk and vanilla. Pour the wet ingredients into dry and mix until combined.

_DSC0207

Dump in the smashed bananas…

_DSC0216

and fold them in.

_DSC0210

Brush pre-heated skillet with a bit of melted butter, then pour a 1/3 cup batter to form each pancake. When bubbles appear all over the top of each pancake, flip and cook until golden brown.

_DSC0227

Remove to a plate and keep warm while you are finishing up the batter and making the amazing sauce.

For the incredible sauce, melt the butter in a skillet over medium heat.

_DSC0226

And add the brown sugar. Turn down the heat just a bit – you don’t want this to burn.

_DSC0248

Then add the syrup, vanilla and cinnamon and mix well.

_DSC0253

Add the bananas and cook until the sauce gets sort of bubbly and the bananas are heated. Don’t overcook this or the bananas will get soggy.

_DSC0254

Amazing, right??

_DSC0269

Serve over banana pancakes. No need for butter or syrup. Mmmmmm!

_DSC0294

Amazing Banana Pancakes

2 cups flour
2 tsp. baking powder
1 1/2 tsp. baking soda
1/2 tsp. salt
3 T. sugar
2 eggs, slightly beaten
2 T. butter, melted
2 cups milk
2 bananas, smashed
1 tsp. vanilla

Mix together flour, baking powder, baking soda, salt and sugar in a large bowl, making a well in the center. In a separate bowl whisk together eggs, melted butter, milk and vanilla. Pour the wet ingredients into dry and mix until combined. Fold in the smashed bananas.

Brush pre-heated skillet with a bit of melted butter, then pour a 1/3 cup batter to form each pancake. When bubbles appear all over the top of each pancake, flip and cook until golden brown. Remove to a plate and keep warm while you are finishing up the batter and making the amazing sauce.

Sauce for Banana Pancakes
This sauce would be great on ice cream too – sort of like bananas foster, but without the booze.

3 bananas, sliced
2 T. butter
1/4 cup brown sugar (I used dark)
1 T. maple syrup
1 tsp. vanilla
1/2 tsp. cinnamon

In a skillet over medium heat, melt the butter and brown sugar together. Turn down the heat just a bit – you don’t want this to burn. Then add the syrup, vanilla and cinnamon and mix well. Add the bananas and cook until the sauce gets sort of bubbly and the bananas are heated. Don’t overcook this or the bananas will get soggy.

Serve over banana pancakes. No need for butter or syrup. Mmmmmm!


tags- breakfast, sweet, pancakes, fruit