One Hour Cast Iron Focaccia

cast iron focaccia bread 1 edited

When I found this recipe the other day, I was a little skeptical- a delicious bread that can be made from start to finish in an hour? I’ve had a few, *ahem*, interesting experiences with rolling out dough, so that didn’t add to my optimism. I decided to give it a go though, and boy, was it worth it!

cast iron focaccia bread 2 edited

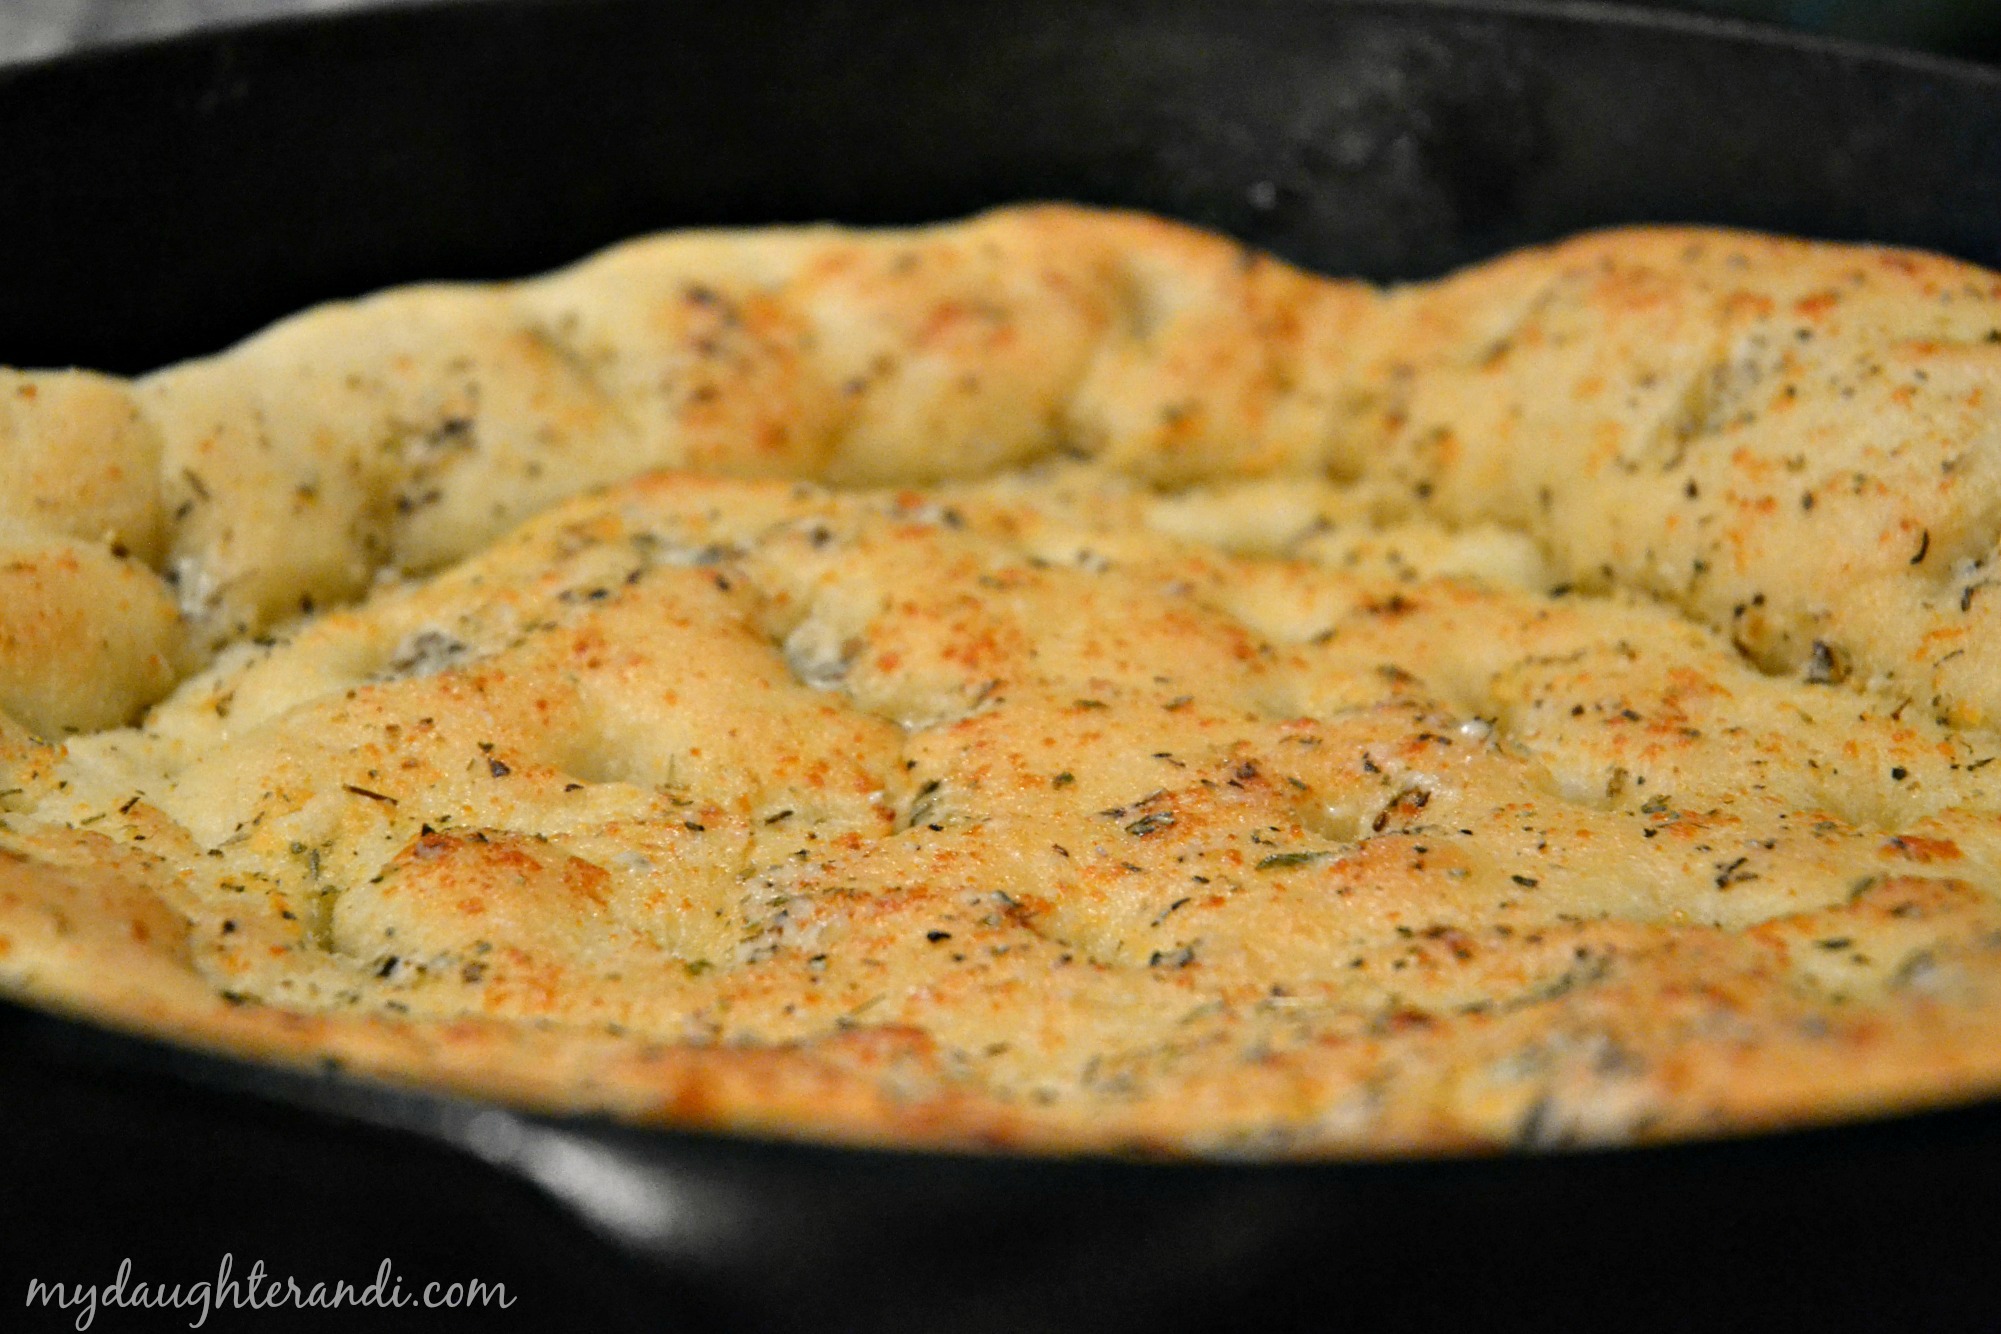
The recipe really was incredibly simple, it only take an hour, and it couldn’t have been any easier to roll out. And the bread was so delicious! The texture was so good- soft inside and a bit crisp on top. I modified the original recipe by adding garlic powder and garlic sea salt- the garlic got a bit crunchy and added a really yummy flavor.

cast iron focaccia bread 3 edited

Cast Iron Focaccia

Slight alterations to Crunchy Creamy Sweet’s recipe

Ingredients for the dough:

3/4 cup warm water

1/2 tsp. sugar

1 1/2 tsp. yeast (Active Dry Yeast)

2 Tbsp. olive oil

2 cups flour (divided in half)

1/2 tsp. salt

For the melted butter mixture:

3 Tbsp. butter, melted

1 Tbsp. grated parmesan

1/2 tsp. Italian seasoning

1/2 tsp. garlic powder

1/2 tsp. garlic sea salt

Instructions:

Place warm water and sugar in the mixing bowl of a stand mixer, and stir until sugar dissolves. Sprinkle the yeast over the top of the water and stir a few times. Let stand for about 5 minutes, or until foamy.

Turn the mixer onto low and add one cup of the flour and the salt, and mix until combined. Add olive oil and mix well. With the mixer on low, add flour until the dough pulls away from the sides of the bowl- I used a bit more than 3/4 of a cup, but it may need anywhere from 3/4 cup to a full cup.

At this point, preheat the oven to 220* and turn it off once it has preheated. Keep the door closed.

Grease the skillet well. Place dough onto a floured surface and fold the dough a few times until it’s no longer sticky. Shape into a ball. Roll out the dough until it’s about the size of your skillet. Place the rolled out dough into the skillet and stretch it up the sides. Cover the skillet with a kitchen towel and place in the oven for 20 minutes to rise.

Take the skillet out of the oven and preheat the oven to 400*. Make indentations in the dough with your fingers. Mix melted butter, parmesan and seasoning in a small bowl. Brush the dough with half the butter.

Place skillet in the preheated oven and bake 16-18 minutes, or until golden brown. Brush with remaining butter. Slice into wedges or squares and serve.

Jordan

Crockpot Mac & Cheese

mac & cheese 1

I have no idea how long I’ve had this recipe, or where it came from. It is written on a tiny scrap of paper that is crumpled and stained – but everyone LOVES this macaroni and cheese. It is simple and delicious.

mac & cheese 2

I’m sure you could mix all the ingredients together and bake it, but I never have. I usually cook the pasta until just under cooked since I don’t want it to get soggy. While the pasta is cooking, I get the rest of the ingredients together and into the Crockpot. Stir well and then let it cook. I normally stir it a couple of times while it is cooking. I often double the recipe- my Crockpot will just barely hold that much.

mac & cheese 3

We love our Mac and cheese with crushed Cheez-It’s on top. As you can see from the picture, we added a bit of leftover chili this time and some chopped green onions to a bowl too. It’s also a great camping meal.

Crockpot Mac & Cheese

1- 16 ounce package macaroni, cooked

1- 12 ounce can of evaporated milk

12 ounces milk, I use 1%

1 tsp. salt

3 cups shredded sharp cheese

1/2 cup melted butter

Cook macaroni, drain well. Spray inside of Crockpot well with cooking spray. Put cooked macaroni and remaining ingredients into Crockpot and stir well. Cover and cook on low for 3 to 4 hours.

Cindy

Throwback Time: Thai Pasta Salad

thai 7 edited final

Thai Pasta Salad has been, by far, our most repinned/viewed post since we started the blog in April. Consistently, whenever I get an email from Pinterest saying that one of my pins has been repinned, it’s the recipe for our Thai Pasta Salad. There’s definitely a reason for this- it’s absolutely delicious!

In case you missed the original post from way back in May, here’s the recipe again. Enjoy!

When I made this recipe today I used fettuccine noodles, don’t do that! They stuck together while cooking and they are harder to eat. Follow the recipe, not the photos. My recipe does actually tell me to use angel hair pasta and I ignored it and now I’m sorry!

This salad gets better with age so if you can, let it cool and sit for several hours or longer before consuming- it is worth the torture of waiting.

thai 2

Cook pasta according to package directions.

While the noodles are cooking, prepare all the veggies and set aside. Then make the sauce, stir the oils and red pepper flakes in a saucepan and heat for about two minutes. Add honey and soy sauce and heat through.

thai 3

Drain the cooked noodles and pour into a large bowl.

thai 4

Pour the warm sauce over the noodles and mix well. There will be quite a bit of sauce in the bottom of the bowl and that is ok. As the noodles cool they will absorb all of that tasty goodness.

thai 5

Add the chopped veggies and mix again.

thai 6

Now cover it and put it in the refrigerator and forget you made it for at least 4 hours or better yet, overnight! Stir again before serving to get everything coated. Sprinkle the toasted sesame seeds and almonds into the whole bowl, or if you have some picky eaters that don’t like nuts in their food then just sprinkle it over the top as you serve and it is almost as good that way.

thai 8

thai 9

Thai Pasta Salad
1 lb. angel hair pasta
1/8 cup vegetable oil
1/4 cup sesame seed oil
1 1/2 tsp. crushed red pepper flakes, more if you like
6 T honey
5 T soy sauce
1 cup shredded carrots
1/2 cup cilantro, chopped
1/2 cup green onions, chopped
1/3 cup bell pepper, chopped (I prefer red)
Toasted sesame seeds and toasted sliced almonds

Cook pasta according to package directions. While the noodles are cooking, prepare all the veggies and set aside. Then make the sauce, stir the oils and red pepper flakes in a saucepan and heat for about two minutes. Add honey and soy sauce and heat through. Drain the cooked noodles and pour into a large bowl. Pour the warm sauce over the noodles and mix well. There will be quite a bit of sauce in the bottom of the bowl and that is ok. As the noodles cool they will absorb all of that tasty goodness. Add the chopped veggies and mix again. Now cover it and put it in the refrigerator and forget you made it for at least 4 hours or better yet, overnight! Stir again before serving to get everything coated. Just before serving sprinkle with the toasted sesame seeds and almonds. Enjoy!

Corn Casserole

corn casserole 1 edited

Hey! I can’t believe that we are almost through July. Where has the summer gone? Because of everyone’s different schedules, we just haven’t had an opportunity to do some of our regular summer routines, such as camping. So sad! But we can enjoy summer food and when I think of summer food, I think of corn. We love this creamy, rich and super easy recipe. I think several people in my family would say that this is one of their favorite side dishes.

It takes about 5 minutes to whip up, so you can pull the rest of your dinner together while it is baking. The day I made this, I grilled some chicken to go with it along with a green salad and some fruit. Easy and delicious!

Mix all the ingredients together…

corn casserole 2

and pour into a casserole dish.

corn casserole 3

Bake uncovered at 350* for about 45 minutes or until cooked through. The top and sides should be lightly browned.

corn casserole 4

We tend to prefer it as listed above, but this dish would be terrific with green chilies, jalapeños or green onions mixed it.

corn casserole 5 edited

corn casserole 6 edited

Corn Casserole
2 cups frozen or fresh corn kernels
1 -15 ounce can cream style corn
1 cup sour cream
1/2 cup butter, melted
1 – 8 ounce box of Jiffy Corn Muffin Mix

Mix all the ingredients together and pour into a casserole dish. Bake uncovered at 350* for about 45 minutes or until cooked through. The top and sides should be lightly browned.

We tend to prefer it as listed above, but this dish would be terrific with green chilies, jalapeños or green onions mixed it.

Thai Pasta Salad

thai 7

Every year our family plus our dogs take a road trip north to my aunt and uncle’s house. They live outside San Francisco so there is tons to do and see. We all love going up to visit, eat, hang out, eat, hunt, and eat.

thanks 5

My aunt is only 4 years older than me, so it’s more like we are sisters, and her three boys are just a few years older than my kids, so it’s fun. Plus, they always seem to come up with some of the most interesting things to do. It’s our tradition to go pheasant hunting, and we have gone go-carting, wine tasting, sight seeing, played bocce ball at an interesting restaurant, picked up fresh crab right off the crab boat and then went straight home to eat it.

thanks 2

^^^just so dang squinty 😉 ^^^

thanks 3

thanks 4

thanks 6

^^^Alcatraz^^^

Looking back at all the fun things we’ve done with them, I’m beginning to see a pattern: we kill animals. And then we eat them.

As horrible as that sounds, it’s completely true. From the pheasant hunting, to the modified axe used to split the fresh crabs before cooking (by the way, the crabs are still alive when we smash them over the axe head :/), and worst of all, the killing of their hand-raised, free-range turkeys for Thanksgiving dinner. This horrible event involves “the cone of death”- an orange traffic cone repurposed to aid in the turkey slaughtering (trust me, you don’t even want to know).

See, they are just fun!

thanks 1

^^^one of their adorable, smiley dogs, Cracker^^^

Anyway, Aunt Sandy is the one who gave me the insane Kalua pork recipe, and this Thai pasta salad is for sure another winner!

When I made this recipe today I used fettuccine noodles, don’t do that! They stuck together while cooking and they are harder to eat. Follow the recipe, not the photos. My recipe does actually tell me to use angel hair pasta and I ignored it and now I’m sorry!

This salad gets better with age so if you can, let it cool and sit for several hours or longer before consuming- it is worth the torture of waiting.

thai 1

Cook pasta according to package directions.

thai 2

While the noodles are cooking, prepare all the veggies and set aside. Then make the sauce, stir the oils and red pepper flakes in a saucepan and heat for about two minutes. Add honey and soy sauce and heat through.

Drain the cooked noodles and pour into a large bowl.

thai 3

Pour the warm sauce over the noodles and mix well.

thai 4

There will be quite a bit of sauce in the bottom of the bowl and that is ok. As the noodles cool they will absorb all of that tasty goodness. Add the chopped veggies and mix again.

thai 5

thai 6

Now cover it and put it in the refrigerator and forget you made it for at least 4 hours or better yet, overnight! Stir again before serving to get everything coated. Sprinkle the toasted sesame seeds and almonds into the whole bowl, or if you have some picky eaters that don’t like nuts in their food (not that I would know anything about that! **wink wink **) then just sprinkle it over the top as you serve and it is almost as good that way. Enjoy!

thai 8

thai 9 edited

^^^I just found a new editing program (picmonkey.com) that I love. And it’s free which means I double love it. Which makes sense if you don’t think about it 🙂 J

Thai Pasta Salad
1 lb. angel hair pasta
1/8 cup vegetable oil
1/4 cup sesame seed oil
1 1/2 tsp. crushed red pepper flakes, more if you like
6 T honey
5 T soy sauce
1 cup shredded carrots
1/2 cup cilantro, chopped
1/2 cup green onions, chopped
1/3 cup bell pepper, chopped (I prefer red)
Toasted sesame seeds and toasted sliced almonds

Cook pasta according to package directions. While the noodles are cooking, prepare all the veggies and set aside. Then make the sauce, stir the oils and red pepper flakes in a saucepan and heat for about two minutes. Add honey and soy sauce and heat through. Drain the cooked noodles and pour into a large bowl. Pour the warm sauce over the noodles and mix well. There will be quite a bit of sauce in the bottom of the bowl and that is ok. As the noodles cool they will absorb all of that tasty goodness. Add the chopped veggies and mix again. Now cover it and put it in the refrigerator and forget you made it for at least 4 hours or better yet, overnight! Stir again before serving to get everything coated. Just before serving sprinkle with the toasted sesame seeds and almonds. Enjoy!