Apple Turnovers

MyDaughterandI- Apple Turnovers

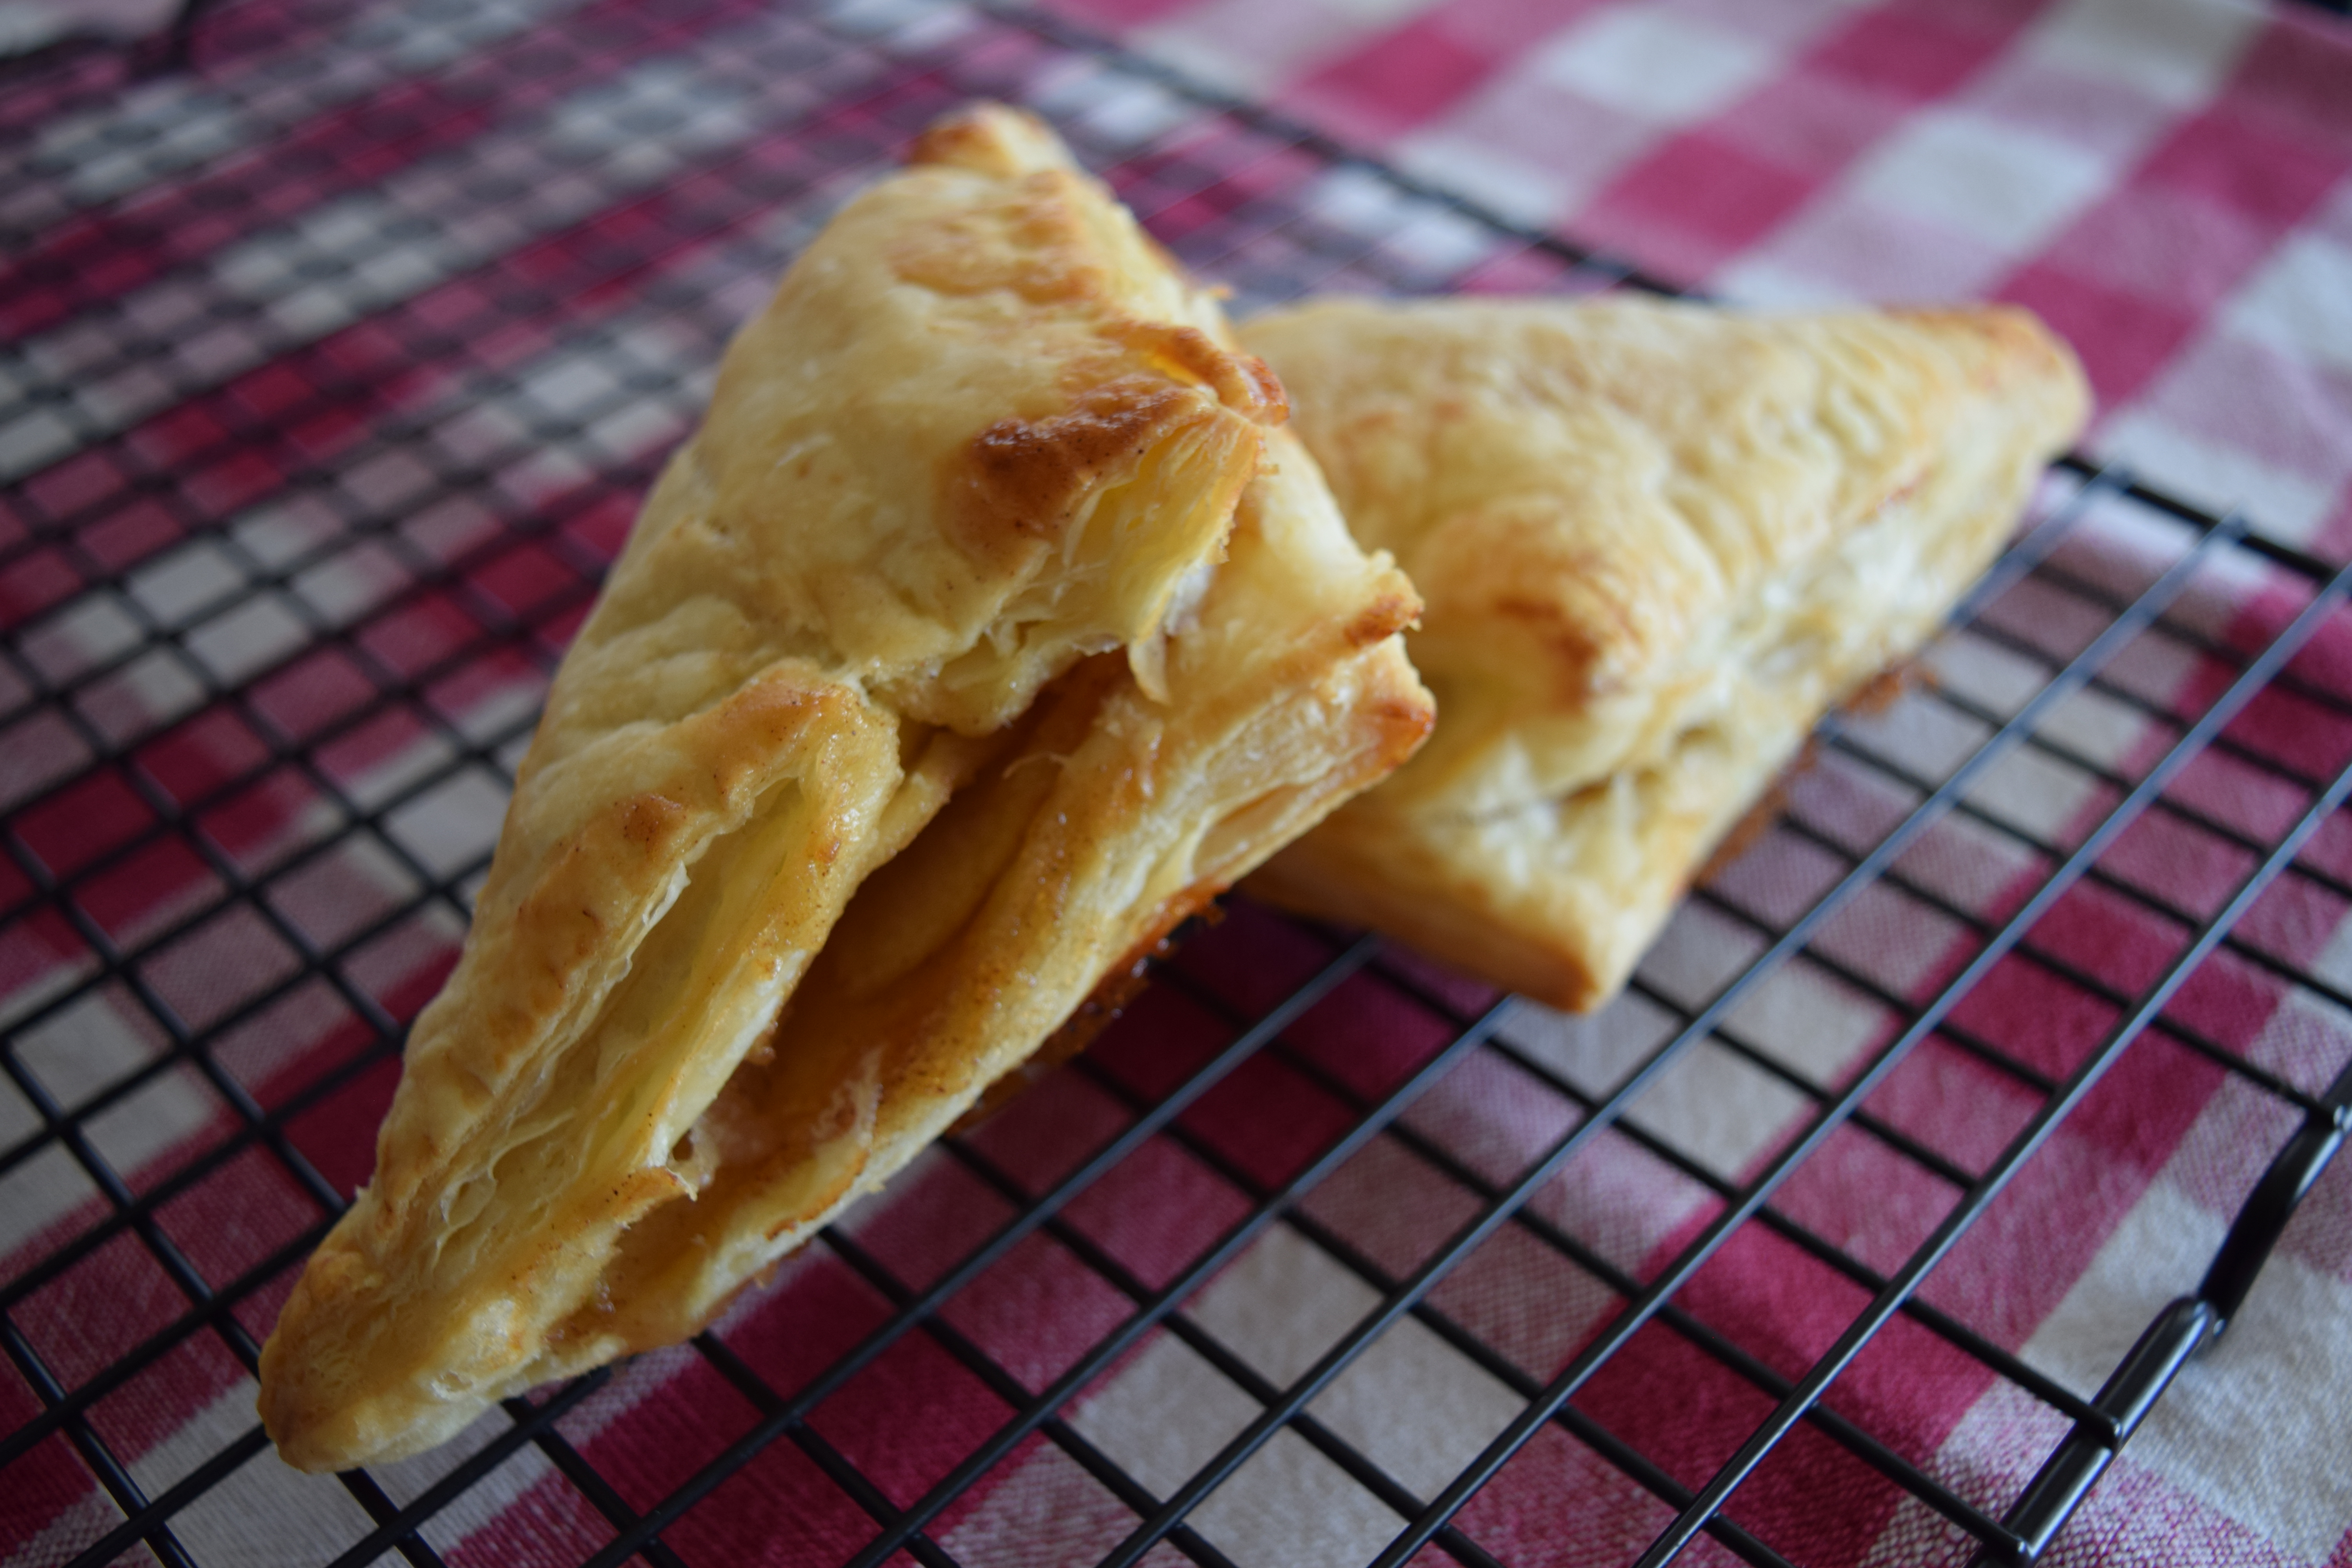
For Father’s Day, we decided to try something a little bit different for dessert- apple turnovers. Somehow we’ve never tried turnovers before, and this first attempt was delicious and so easy!

My dad’s favorite dessert is apple pie, but due to limited time, and no ready-made pie crust, we couldn’t whip up a pie. Instead, we used up some puff pastry sheets that we had in our freezer, and made these delicious turnovers.

They were definitely a hit- we served them with a scoop of vanilla ice cream, and some caramel sauce drizzled over the top. It’s definitely a keeper recipe!

DSC_0009

Apple Turnovers

  • 4 Granny Smith apples – peeled, cored and sliced
  • 2 tablespoons butter
  • 1 cup brown sugar
  • 1 teaspoon ground cinnamon
  • 1 tablespoon cornstarch
  • 1 tablespoon water
  • 1 (17.25 ounce) package frozen puff pastry sheets, thawed

Directions:

  1. Melt butter in a large skillet over medium heat. Place apples in pan, and cook and stir for about 2 minutes. Add brown sugar, and cinnamon, and cook, stirring, for 2 more minutes. Stir together cornstarch and 1 tablespoon water. Pour into the skillet, and mix well. Cook for another minute, or until sauce has thickened. Remove from heat to cool slightly.
  2. Preheat the oven to 400 degrees F (200 degrees C).
  3. Unfold puff pastry sheets, and repair any cracks by pressing them back together. Trim each sheet into a square. Then cut each larger square into 4 smaller squares. Spoon apples onto the center of each squares. Fold over from corner to corner into a triangle shape, and press edges together to seal. Place turnovers on a baking sheet, leaving about 1 inch between them.
  4. Bake for 25 minutes in the preheated oven, until turnovers are puffed and lightly browned.

Cindy & Jordan

Advertisement

Throwback: Cookies & Cream Chex Bars- Gluten Free!

My Daughter and I- Cookies and Cream Chex Bars

I was asked by a friend of mine to make several desserts for a party she was having. The catch was that she asked me to make one of the desserts gluten free. I also needed to make the desserts portable and easy to eat since it would be an outdoor/casual event. I have to admit that I’m not at all familiar with gluten free recipes so I was stumped. However, I found this delicious looking recipe on Iowa Girl Eats and knew it was the one to try.

The bars came together easily and the flavor was good. I was skeptical of the gluten free “Oreos” and they really weren’t bad. I found them in the baking aisle at Walmart too, so that was great. The crushed Oreos and the extra chocolate on the top made them look a bit better – but they still weren’t the most attractive dessert ever. Once they were all cut up and on the cute platter – all was good. The dessert were a huge success and I would make this recipe again for a quick and easy dessert. It also made a ton which is nice when attending a party or potluck. Another bonus was that these are no bake bars, which made them even easier.

I also made lime squares and oatmeal raisin cookies with white chocolate chips and macadamia nuts, which are quickly becoming one of our most favorite cookies!

My Daughter and I- Cookies and Cream Chex Bars 2

Cookies & Cream Chex Bars

Ingredients
1/4 cup butter
10oz bag mini marshmallows
12.1 ounce box Vanilla Chex
20 Oreos or a gluten-free version, divided
1/2 cup semisweet chocolate chips

Instructions
Spray a 9×13″ baking dish with nonstick spray then set aside.

Roughly chop 16 Oreos then add to a very large bowl with the Chex and set aside. Chop remaining 4 Oreos a little more fine then set aside.

Add butter to a microwave-safe bowl then microwave for 30 seconds or until melted. Add marshmallows then stir to coat and microwave for 1 minute and 20 seconds. Stir until smooth then immediately pour over Chex mixture and mix until evenly coated. Scoop into prepared baking dish then press into an even layer, I used a piece of wax paper with a bit of nonstick spray on it to press the mixture evenly into the pan.

Melt the semisweet chocolate chips in a microwave safe bowl for approximately 2 minutes. Stirring every 30 seconds – don’t over heat it. You just want it melted enough to drizzle over the top of the bars. Drizzle the melted chocolate and then sprinkle the crushed Oreos and lightly press so they stick. Allow the bars to cool completely before cutting into squares. I was able to cut into about 4 dozen squares.

Cindy

Flourless Almond Butter Chocolate Chip Cookies {gluten free!}

My Daughter and I Flourless Almond Butter Chocolate Chip Cookies 1

Jordan made these cookies the other day and we both thought they were great. They aren’t the prettiest cookies ever, but they were tasty and super simple to make. No butter, no flour, whipped up in one bowl in about five minutes! Why wouldn’t you give them a try?

My Daughter and I Flourless Almond Butter Chocolate Chip Cookies

Flourless Almond Butter Chocolate Chip Cookies {gluten free!}

Ingredients:
1 large egg

1 cup almond butter, we used crunchy, unsalted from Trader Joe’s

1/2 cup light brown sugar, lightly packed

1 tsp baking soda

2 tsp. vanilla

3/4 cup dark chocolate chips or mini semisweet chips

Instructions:
Preheat oven to 350F
Crack the egg into a medium bowl and beat it lightly. Add in the almond butter, vanilla, baking soda, and sugar and mix everything together well. Fold in the chocolate chips.

Scoop the dough onto a parchment or silpat lined baking sheet. I use a (1 3/4 inch) scoop, but you can use a tablespoon. Space the cookies well apart, and flatten them slightly with the back of a spoon.

Bake for 8 to 10 minutes. Don’t overbake these, the cookies will look underdone, but they will firm up as they cool.

Let them cool for a couple of minutes on the baking sheet, then transfer them carefully to a cooling rack.

Because we used a crunchy almond butter the cookies had a definite “healthy” look to them. I loved the extra texture, but if you’d prefer a little less texture, I would recommend using a smooth almond butter.

Recipe found on http://www.theviewfromgreatisland.com


Cindy & Jordan

Mini Banana Cream Pies

My Daughter and I- Mini Banana Cream Pies

Quite a while back, we posted our famous Faux Banana Cream Pie and it’s still one of our all-time favorites. It’s the perfect combination of easy and totally delicious. Not only is it a favorite in our family, it’s also one of our more requested desserts for bringing to potlucks and events.

We had a friend’s bridal shower a few weekends ago, and the hostess asked us to make banana cream pie. For a fun twist, we decided to make them single serving, displayed in little mason jars. Even though serving the dessert in jars made prep a bit more time-consuming, the end result was so fun! It was such a cute and perfect for the bridal shower.

My Daughter and I- Mini Banana Cream Pies 1

Mini Banana Cream Pies

1 1/2 cups graham cracker crumbs (about 1 1/2 packages, crushed in food processor)
2 T sugar
1/3 cup butter, melted
3 bananas, sliced
1 8 ounce package cream cheese, softened (I use low fat)
2 packages instant vanilla pudding, 4 serving size
3 1/2 cups milk ( I use 1%)
1 8 ounce tub Cool Whip, thawed

Melt butter, and mix with the crushed graham crackers and sugar. Mix well, and then press into the bottom of the mason jars. I used a cookie scoop to measure and press the crust down into the jars. Arrange sliced bananas on top of crust. Beat cream cheese in a large bowl until smooth, gradually beat in milk and pudding mixes. Beat until well blended – but don’t worry if you see some cream cheese globs, it’s fine. Spread pudding mixture over the banana slices. Spread Cool Whip over pudding. Refrigerate 3 hours or until ready to serve. It’s good the next day, but after a couple days the bananas start getting sort of funky, so eat it for breakfast!

Cindy & Jordan 

Carrot Cake

My Daughter and I- Carrot Cake

Hey! I feel like it’s been a very long time since I’ve posted a new recipe. I’m not sure what has been going on around here, but clearly it’s not cooking or at the very least not posting new recipes 🙂

Today I have a good one – carrot cake! This cake is simple to put together and has beautiful color and texture, thanks to all the freshly grated carrots. It’s almost like eating a salad! Except that it’s covered in a rich, delicious cream cheese frosting…so I guess not so much like a salad. Anyway, you need to try this delicious recipe today!

My Daughter and I- Carrot Cake 1

Carrot Cake
For the cake:
2 cups Sugar
1 cup Vegetable Oil
4 whole Eggs
1 tsp vanilla
2 cups All-purpose Flour
1/2 teaspoon Salt
1 teaspoon Baking Soda
1 teaspoon Baking Powder
1 teaspoon Ground Cinnamon
2 cups Grated Carrots

For the frosting:
1 stick Regular Butter, Softened
1 package (8 Oz) Cream Cheese
1 pound Powdered Sugar
1/2 tsp cinnamon
2 teaspoons Vanilla
1 cup Pecans, Chopped Finely

Instructions for cake:
Preheat oven to 350*
Mix together the sugar and oil in mixer. Add the eggs and then the vanilla and mix until creamy. In another bowl sift together flour, salt, baking powder, baking soda and cinnamon. Add the dry ingredients to the mixer and combine. Then add carrots and mix well. Pour into a well greased and floured Bundt pan and bake at 350* for 45 to 50 minutes or until done.

Cool completely before frosting.

Icing:
In large bowl, cream butter and cream cheese. Add sugar and vanilla and blend, then mix in the nuts. Spread on cooled carrot cake.

Recipe from The Pioneer Woman– I just made a few minor modifications.

Cindy